The Fourth of July is one of my favorite holidays. There’s something about dressing up in red, white, and blue, and having an excuse to tuck tiny sparklers into everything.
There’s no shortage of red, white, and blue appetizers, or star shaped desserts—but I want to help you create something new—stand out amongst the star spangled crowd.
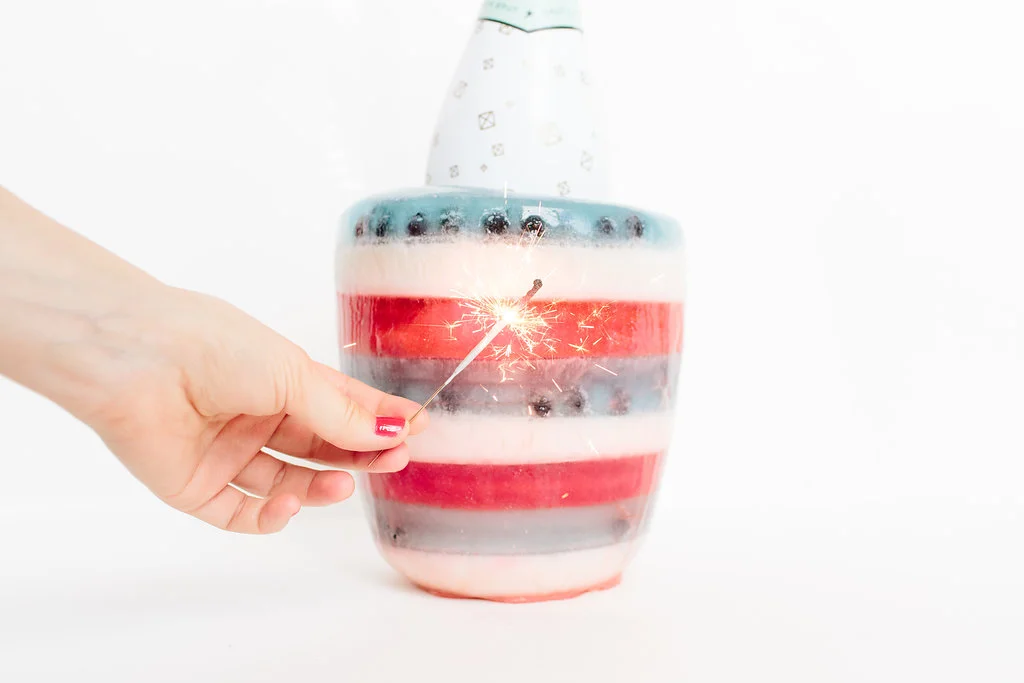
While this patriotic icy champagne bucket is reminiscent of childhood summer popsicles, it’s sophisticated enough to make any adult smile and wonder how you did it.
Once you master this technique, play with variations that will make any holiday just a bit more special (imagine holly and small pinecones frozen into clear water, or sweet heart roses for Valentine’s day).
Display the ice bucket on a pretty plate (with a small towel tucked underneath to absorb any melted ice) with red and blue berries piled around the base. If kept out of direct sunlight, it will stay frozen for at least a few hours.
Food La La: Fourth of July Icy Champagne Bucket
Materials:
- Plastic champagne bucket (or sand bucket or even small garbage can, mine was about 2 gallons.)
- Quart sized cylinder plastic container (I used one from the Whole Foods olive bar – whatever you use, make sure the base of your champagne bottle can fit in it)
- Half gallon milk
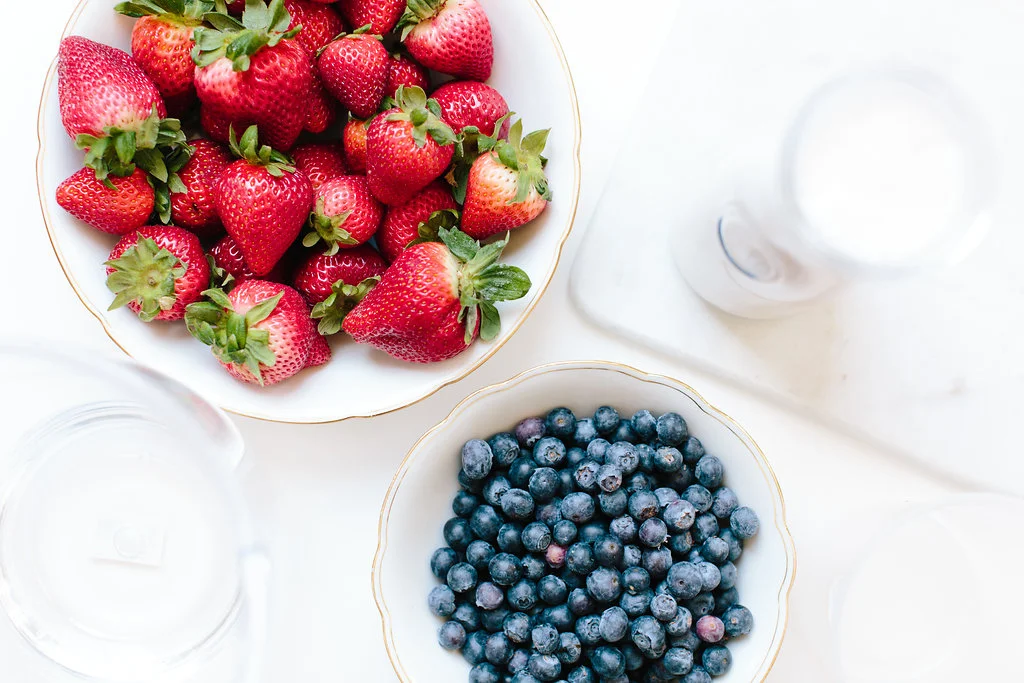
- 3 cups blueberries
- 3 cups red berries*
- Red food coloring
- Blue food coloring
Steps:
- Clear a space in your freezer where the bucket can stand upright.
- Pour milk into bucket until there is a 1.5” white layer (about 2 cups depending on size of your bucket). Freeze until solid.
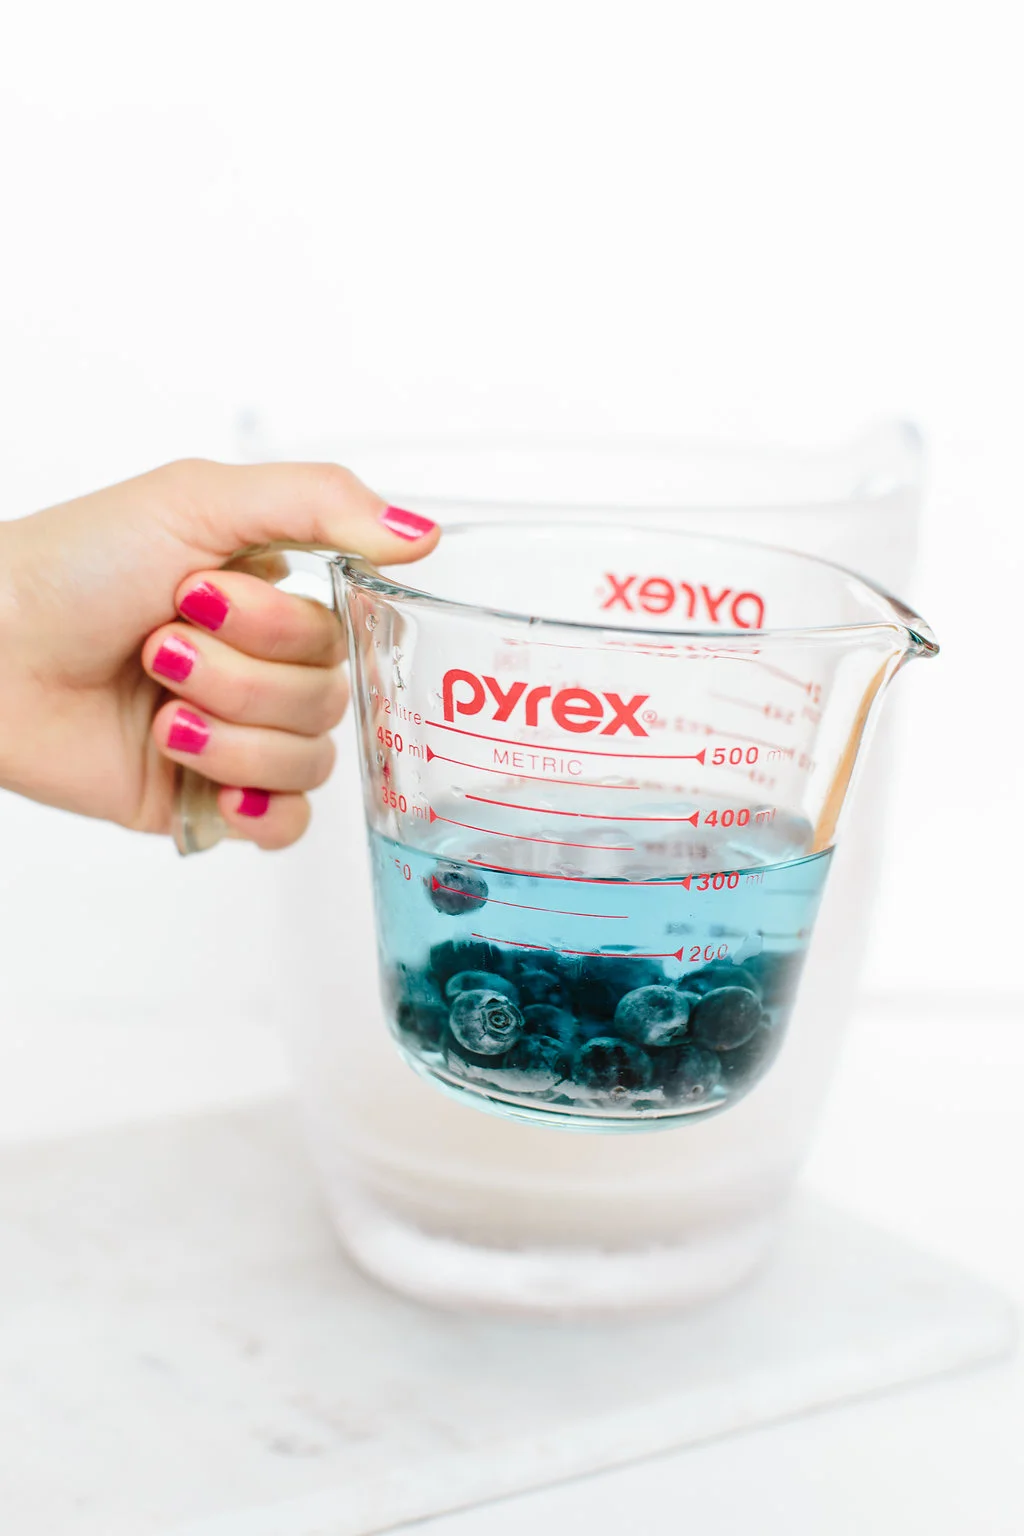
- Mix cold (WHY? #1) water with a few drops of blue food coloring and a handful of berries. Pour over milk layer until there is a 1.5” of the blue layer. Freeze until solid.
- Mix cold water with a few drops of red food coloring and a handful of red berries. Pour over blue layer until there is a 1.5” of the red layer. Freeze until solid.
- Pour milk into bucket until there is a 1.5” white layer. Freeze until solid.
- Place the quart sized plastic container in the center of the champagne bucket and weigh down (I used a glass mason jar, but you could also try rocks, sand, or a paperweight).
- Repeat step #3, pouring blue water around outside of the plastic container. Freeze until solid.
- Continue to layer the colors until the bucket is almost full, but leave 1-2” of space at the top (the ice will expand).
- When the final layer is frozen, fill the plastic container with cold water. Let sit for 5-10 minutes then slide the plastic container out.
- To remove the ice sculpture from the plastic champagne bucket, hold it under cold running water and rotate. The ice will start to melt just enough to ease it out of the champagne bucket. (This took a little longer than I expected, but eventually it came out. You could also try filling your sink with cold water and letting the bucket sit.)
- Store in freezer.
- To use, place on a small plate, add a champagne bottle and fill any excess space with crushed ice.
- Wipe outside with a clean wet sponge to melt the layer of frost and make the colors pop!

Psst! A few notes:
- I cut small star shapes out of strawberries, but when the bucket was complete they were difficult to see. Next time, I might try whole raspberries, or even use whole small strawberries.
- The bucket will stay frozen for a few hours. I start with the white layer on the bottom so if it does begin to melt it will be harder to notice.
- Do not use hot water to remove the ice bucket from the plastic container. It may crack the ice.
- WHY #1? If you use warm water it will start to melt the milk layer and the colors will bleed together.